
Par-baking pizza is a convenient and efficient method for achieving a perfectly cooked crust. It involves partially baking the dough to set its shape and remove excess moisture, creating a sturdy base for toppings. This technique is ideal for home cooks and professionals alike, allowing for customization and quick meal preparation. By par-baking, you ensure the crust is crispy and the toppings are evenly cooked. This guide will walk you through the process, from preheating to final baking, helping you achieve a delicious homemade pizza with minimal effort.
Tools and Equipment
To successfully par-bake a pizza, you’ll need the right tools and equipment. These essentials ensure your dough is properly handled, baked, and prepared for toppings. Here’s a list of what you’ll need:
- Pizza Peel or Baking Sheet: A pizza peel is ideal for transferring the dough to the oven, but a sturdy baking sheet can also work. Ensure it’s lightly floured or oiled to prevent sticking.
- Baking Stone or Steel: Preheating a baking stone or steel in your oven is crucial for achieving a crispy crust. These retain heat well and distribute it evenly, cooking the dough uniformly.
- Oven: A standard home oven or a dedicated pizza oven can be used. Preheat it to the recommended temperature (usually around 450°F) before baking. If using a pizza oven, ensure it’s assembled and ready for use.
- Dough Scraper or Pizza Cutter: This tool helps shape the dough and remove it from surfaces without tearing. It’s also useful for portioning dough into smaller sizes if needed.
- Wire Rack: After par-baking, cooling the crust on a wire rack prevents it from becoming soggy. This step is essential before adding toppings and finishing the bake.
- Timer: Monitoring the baking time is critical. A timer ensures you don’t overcook the crust during the par-bake or final bake. Most par-baked crusts take 5–7 minutes, while fully topped pizzas take 7–10 minutes.
- Fork or Dough Docker: Pricking the dough with a fork before baking helps release air bubbles and prevents the crust from puffing up unevenly during the par-bake.
- Oven Mitts: These are essential for handling hot baking stones or sheets. Always prioritize safety when working with high temperatures.
Having these tools on hand ensures a smooth par-baking process. Start by preheating your oven and baking stone while you prepare the dough. Once the dough is ready, use the peel or sheet to transfer it to the preheated stone. Bake until the crust is set but not browned, then cool it on a wire rack before adding toppings. With the right equipment and a bit of practice, you’ll achieve professional-quality results at home.
Preparing the Dough
Preparing the dough is the first and most crucial step in creating a delicious par-baked pizza. Proper preparation ensures the dough is ready for the par-baking process and will yield a crispy, flavorful crust. Follow these steps to prepare your dough effectively:
- Let the Dough Rest: If using pre-made dough, allow it to come to room temperature. This step is essential for making the dough pliable and easier to shape. For homemade dough, let it rise according to your recipe instructions, typically 1–2 hours, until it has doubled in size.
- Activate the Yeast (for Homemade Dough): If making dough from scratch, mix lukewarm water (around 100°F) with yeast and a pinch of sugar. Let it sit for 10–15 minutes until frothy and bubbly, indicating the yeast is active and ready to use.
- Combine Ingredients: Add flour, salt, and oil to the yeast mixture. Mix until a dough forms, then knead on a floured surface for 8–10 minutes until smooth and elastic. Avoid overworking the dough, as this can lead to a tough crust.
- Portion the Dough: Divide the dough into portions based on the size of pizza you prefer. For a standard pizza, use 1–2 pounds of dough, depending on thickness preferences.
- Shape the Dough: Roll or stretch the dough into your desired shape, either by hand or using a rolling pin. Transfer the dough to a lightly floured pizza peel or baking sheet to prepare for baking;
- Prick the Dough: Use a fork to prick the dough all over, preventing air bubbles from forming during the par-bake. This step ensures an even texture and prevents the crust from puffing up excessively.
Proper dough preparation sets the stage for a successful par-bake. Once the dough is ready, it’s time to move on to the par-baking process. Remember, the dough should be soft and pliable but not overly sticky. If using pre-made dough, skip the mixing and rising steps and proceed directly to shaping. With your dough prepared, you’re one step closer to enjoying a perfectly cooked, crispy-crusted pizza.

Preheating the Oven
Preheating the oven is a critical step in the par-baked pizza cooking process. A properly preheated oven ensures even cooking, a crispy crust, and a well-textured pizza. Follow these steps to preheat your oven effectively:
- Set the Temperature: Preheat your oven to 450–500°F (230–260°C), depending on your oven’s capabilities and the thickness of your pizza dough. Convection ovens may require slightly lower temperatures to prevent burning.
- Use a Baking Stone or Steel: Place a baking stone or steel in the oven during preheating. These materials absorb moisture from the dough and distribute heat evenly, resulting in a crisper crust. Allow the stone or steel to preheat for at least 30 minutes to 1 hour;
- Ensure Even Heat Distribution: If your oven tends to have hot spots, rotate the baking stone or steel halfway through the preheating time to ensure uniform heat distribution.
- Preheat for Sufficient Time: A longer preheating time yields better results; Preheat your oven for at least 45 minutes to 1 hour before baking. This ensures the oven reaches its maximum temperature and maintains stability.
- Check Oven Readiness: Use an oven thermometer to verify the temperature. Once the oven is preheated, carefully place the pizza dough on the baking stone or steel. The dough should sizzle slightly upon contact, indicating the surface is hot and ready.
Preheating the oven is essential for achieving a perfectly cooked par-baked pizza. A hot oven prevents the dough from steaming instead of baking, ensuring a crispy crust and a well-cooked base for your toppings. By following these steps, you’ll be ready to move on to the par-baking process with confidence.

The Par-Baking Process
The par-baking process is a crucial step in creating a perfect pizza crust. It involves partially baking the dough before adding toppings, ensuring the crust is set and preventing it from becoming soggy when toppings are added later. Follow these steps to achieve a flawless par-bake:
- Place the Dough on the Preheated Surface: Carefully transfer the prepared pizza dough to the preheated baking stone, steel, or oven rack. If using parchment paper, place the dough on the paper first to simplify handling.
- Bake at High Temperature: Bake the dough in the preheated oven at 450–500°F (230–260°C) for 2–4 minutes. The exact time depends on the thickness of the dough and your oven’s performance. A thinner crust will be ready faster, while a thicker crust may require a few more minutes.
- Monitor for Even Cooking: Keep an eye on the dough to ensure it bakes evenly. If one side appears to be cooking faster, rotate the pizza halfway through the baking time. This prevents uneven browning and ensures a consistent texture.
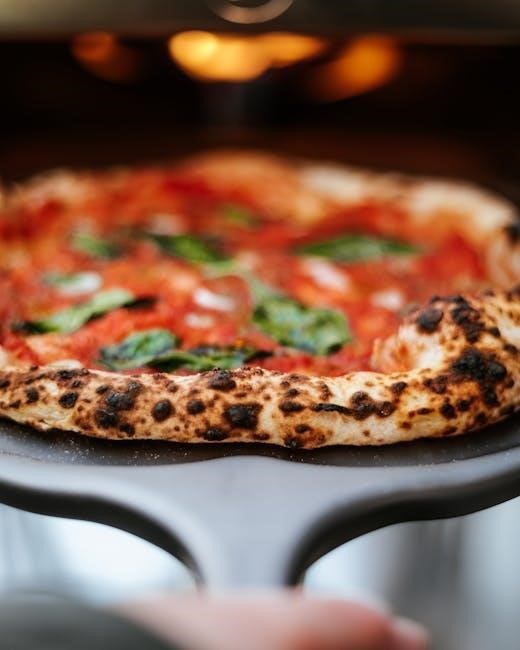
- Look for the Right Texture: The par-baked crust should be lightly golden around the edges and set in the center but not fully cooked. It should still retain some softness in the middle, as it will finish cooking during the final bake. Avoid over-baking, as this can make the crust too dark and rigid.
- Allow the Crust to Cool: Once par-baked, remove the crust from the oven and let it cool slightly on a wire rack. This step helps prevent steam from building up and makes it easier to handle the crust when adding toppings later.
The par-baking process ensures that your pizza crust has a solid foundation before adding toppings. By partially cooking the dough, you prevent sogginess and create a crispy, well-textured base for your pizza. This step is especially important for pizzas with wet or heavy toppings, as it keeps the crust firm and flavorful.
Remember, the par-baking time may vary depending on your oven and the thickness of the dough. Always keep an eye on the crust to avoid overcooking, and let it cool before proceeding to the next step.
Adding Toppings
Once the par-baked crust is ready, it’s time to add your favorite toppings. This step is where you can get creative and personalize your pizza to suit your taste preferences. However, there are some key guidelines to follow to ensure your pizza turns out perfectly:
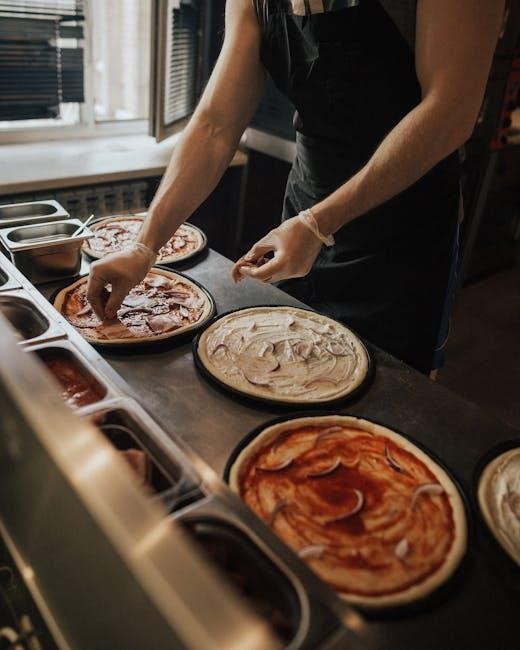
- Spread the Sauce Evenly: Start by spreading a thin, even layer of tomato sauce or your preferred base (e.g., pesto or olive oil) over the par-baked crust. Avoid overloading the pizza with too much sauce, as this can make the crust soggy during the final bake.
- Add Cheese: Sprinkle a layer of cheese over the sauce. Mozzarella is the most popular choice due to its melting properties, but you can also mix in other cheeses like parmesan, provolone, or gorgonzola for added flavor. Be mindful not to overload the pizza with cheese, as this can lead to a greasy texture.
- Choose Your Toppings Wisely: Select toppings that complement each other in terms of flavor and texture. Common toppings include pepperoni, mushrooms, bell peppers, onions, olives, and fresh herbs like basil or oregano. For a vegetarian option, consider roasted vegetables like zucchini or eggplant. If you’re a meat lover, add pepperoni, sausage, or bacon for a hearty flavor.
- Balance Wet and Dry Toppings: Wet toppings, such as fresh tomatoes or mushrooms, can release moisture during baking. To prevent sogginess, pair them with dry toppings like pepperoni or cheese. You can also pre-cook wet ingredients slightly before adding them to the pizza.
- Don’t Overload the Pizza: Too many toppings can overwhelm the crust and make the pizza difficult to handle. Stick to 3–4 toppings to ensure each flavor shines and the crust remains sturdy.
- Add Fresh Herbs Last: If using fresh herbs like basil or oregano, sprinkle them over the pizza after the final bake. This preserves their flavor and texture, as high heat can cause them to lose their brightness.
Adding toppings is where you can truly personalize your pizza. Whether you prefer classic combinations or unique flavor profiles, the key is to balance flavors and textures. Keep in mind that the par-baked crust is delicate, so handle it gently when adding toppings to avoid tearing. Once your toppings are in place, your pizza is ready for the final bake.
Remember, the quality of your toppings directly impacts the overall taste of your pizza. Use fresh, high-quality ingredients to ensure the best results. Now, your pizza is one step closer to being perfectly cooked and ready to enjoy!

Final Baking Instructions
After adding your desired toppings, it’s time to complete the cooking process with the final bake. This step ensures the crust is fully cooked, the cheese is melted to perfection, and the flavors are harmoniously combined. Follow these instructions carefully to achieve a delicious, professionally baked pizza at home:
- Preheat the Oven: Ensure your oven is preheated to the highest temperature setting, typically between 475°F (245°C) and 550°F (290°C). If you have a pizza stone or steel in the oven, let it preheat for at least 30 minutes to retain heat evenly.
- Place the Pizza in the Oven: Carefully transfer the topped par-baked pizza to the preheated oven. Position it in the center of the oven rack to ensure even cooking. If using a pizza stone, place the pizza directly on the stone for a crispier crust.
- Bake for 8–12 Minutes: Depending on your oven’s power and the thickness of the crust, bake the pizza for 8–12 minutes. Keep an eye on it after the 8-minute mark, as the cooking time can vary. The pizza is ready when the crust is golden brown, the cheese is bubbly, and the toppings are fully cooked.
- Check for Doneness: Look for visual cues to determine if the pizza is done. The edges of the crust should be golden, the cheese should be melted and slightly browned, and any meat toppings should be fully cooked. If using fresh herbs, they should be fragrant but not burnt.
- Remove and Let Rest: Once baked to your liking, use a pizza peel or oven mitts to carefully remove the pizza from the oven. Place it on a wire rack or cutting board and let it rest for 2–3 minutes. This allows the cheese to set and prevents the toppings from sliding off when sliced.
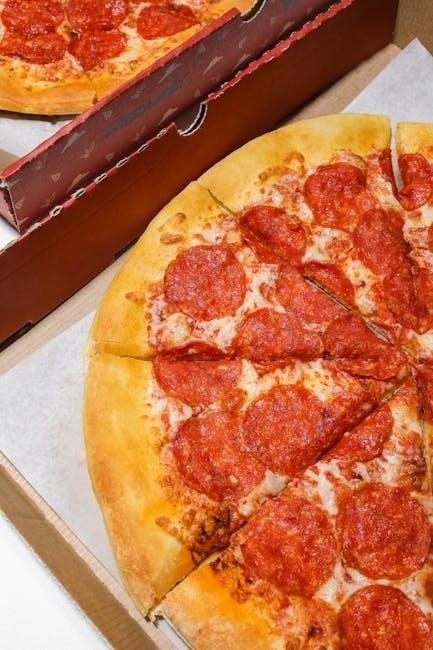
- Slice and Serve: Use a sharp pizza cutter or knife to slice the pizza into even portions. Serve immediately while the cheese is still melted and the crust is crispy. Garnish with fresh basil or a drizzle of olive oil for an extra touch of flavor.
Remember, the final bake is the most critical step in achieving a perfectly cooked pizza. Keep an eye on the pizza at all times, as oven temperatures can vary, and overcooking can happen quickly. By following these instructions, you’ll enjoy a homemade pizza that rivals your favorite pizzeria. Now, it’s time to sit back, slice, and savor the fruits of your labor!
Always prioritize safety when handling hot ovens and sharp tools. Enjoy your perfectly baked par-baked pizza with family and friends!

Safety and Storage
When working with par-baked pizzas, safety and proper storage are essential to ensure a enjoyable cooking experience and maintain the quality of your pizza. Follow these guidelines to handle and store your par-baked pizza correctly:
- Oven Safety: Always use oven mitts or tongs to handle the pizza, as it will be extremely hot after baking. Keep children away from the oven while it is in use, and never leave the kitchen unattended during the cooking process.
- Handling Hot Surfaces: Be cautious when placing or removing the pizza from the oven, as the oven rack, pizza stone, or baking sheet will be extremely hot. Use a clean, dry oven mitt or towel to protect your hands from burns.
- Knife and Cutting Safety: When slicing the pizza, use a sharp knife or pizza cutter on a stable, heat-resistant surface. Always cut away from your body and keep your fingers clear of the blade.
- Storage Before Baking: If you plan to bake the par-baked pizza later, store it in an airtight container or plastic bag in the refrigerator. Ensure the pizza is completely cool before storing to prevent moisture buildup, which can make the crust soggy. It can be refrigerated for up to 24 hours.
- Freezing Instructions: For longer storage, place the par-baked pizza in a freezer-safe bag or wrap it tightly in plastic wrap and aluminum foil. Frozen par-baked pizzas can be stored for up to 3 months. When you’re ready to bake, thaw the pizza in the refrigerator overnight or at room temperature for a few hours before baking.
- Leftover Storage: After baking, allow the pizza to cool completely on a wire rack to prevent steam from trapping moisture. Store leftovers in an airtight container in the refrigerator for up to 3 days. Reheat leftovers in the oven or microwave until hot and bubbly.
- Hygiene Practices: Always wash your hands before and after handling food. Ensure all utensils and surfaces are clean to prevent cross-contamination and foodborne illness.
By following these safety and storage tips, you can enjoy your par-baked pizza while maintaining a safe and hygienic cooking environment. Proper storage will also help preserve the quality of your pizza, ensuring it tastes fresh and delicious when you’re ready to bake it.
Remember, safety should always come first when working with hot appliances and sharp tools. Happy cooking!
Tips for Perfect Results
Achieving the perfect par-baked pizza requires attention to detail and a few expert tips to ensure your crust is crispy, your toppings are evenly cooked, and your flavors are balanced. Here are some essential tips to help you master the process:
- Preheat Properly: Ensure your oven is preheated to the correct temperature before placing the pizza inside. A hot oven is crucial for a crispy crust, so wait for it to reach the desired temperature before baking.
- Use a Pizza Stone: Placing a pizza stone or baking steel in the oven during preheating can help distribute heat evenly and absorb moisture, resulting in a crisper crust. Allow the stone to preheat for at least 30 minutes before baking.
- Don’t Overload the Pizza: Too many toppings can make the pizza soggy and difficult to cook evenly. Stick to a balanced combination of ingredients to ensure the crust remains crispy and the toppings are fully cooked.
- Handle the Dough Gently: When stretching or shaping the dough, avoid overworking it, as this can lead to a dense, tough crust. Instead, let the dough relax if it becomes too tight, and gently guide it into the desired shape.
- Chill Before Baking: If you’re not baking the par-baked pizza immediately, refrigerate or freeze it to firm up the dough. This will make it easier to handle and help the crust bake more evenly.
- Check for Doneness: Keep an eye on the pizza during the final baking stage. The crust should be golden brown, and the cheese should be bubbly and slightly caramelized. Avoid overbaking, as this can make the crust dry and brittle.
- Add Fresh Toppings Last: If using fresh ingredients like basil or arugula, add them after baking for the best flavor and texture. This prevents delicate herbs from wilting or burning in the oven.
- Experiment with Oils: Brushing the crust with olive oil or garlic butter before baking can enhance flavor and create a golden-brown finish. For an extra crispy crust, try using a small amount of cornmeal on the baking surface.
- Let It Rest: After baking, allow the pizza to cool for a few minutes before slicing. This helps the cheese set and prevents the toppings from sliding off the slices.
- Invest in Quality Ingredients: The taste of your pizza depends heavily on the quality of your ingredients. Use fresh, high-quality cheese, sauce, and toppings to ensure the best flavor.
By following these tips, you’ll be able to achieve a perfectly cooked par-baked pizza with a crispy crust, well-cooked toppings, and delicious flavor. Remember, practice makes perfect, so don’t be discouraged if it takes a few attempts to get it just right. Happy baking!
Mastering the art of par-baked pizza cooking is a rewarding process that combines technique, patience, and creativity; By following the steps outlined in this guide, you can create delicious, restaurant-quality pizzas in the comfort of your own kitchen. Par-baking is a versatile method that allows for customization, whether you’re preparing a quick weeknight meal or hosting a gathering with friends and family.
The key to success lies in understanding the importance of each step, from preparing the dough to the final baking process. Taking the time to preheat your oven properly, handle the dough gently, and monitor the baking progress ensures a crispy crust and perfectly cooked toppings. Additionally, experimenting with different ingredients and techniques can help you develop your unique pizza style.
One of the greatest advantages of par-baking is its flexibility. You can prepare the crust ahead of time and store it for later use, making it an excellent option for meal prep or unexpected guests. With practice, you’ll find the perfect balance between a crunchy crust and a flavorful, well-cooked topping combination.
Remember, pizza-making is an art that allows for experimentation and personalization. Don’t be afraid to try new ingredients, sauces, or cooking techniques to elevate your par-baked pizzas. Whether you prefer classic combinations or innovative flavor profiles, the foundation of a well-prepared crust and thoughtful topping arrangement will always shine through.